How to Dismantle & Install Curtains for Cleaning in Singapore: A Step-by-Step Guide

Curtains are one of the most overlooked yet essential parts of home cleanliness. In Singapore’s humid climate, they trap dust, odors, and even mold over time. But beyond hygiene, there’s a lesser-known reason you should clean your curtains regularly: your rental contract might require it.
Taking the time to dismantle your curtains yourself can save money — especially if you’re sending them to a professional laundry for cleaning. Most curtain cleaning services in Singapore charges 50% lower if you can dismantle curtains and install them yourself.
Whether you’re a renter doing your due diligence, a homeowner keeping your space fresh, or just someone considering hiring a professional, here’s a full guide to dismantling and reinstalling curtains for cleaning — tailored for Singapore homes.
1. Why You Should Wash Your Curtains Regularly in Singapore 🏠
📜 It’s Often in Your Tenancy Agreement
Most landlords in Singapore include a clause in the rental agreement that requires tenants to dry clean curtains professionally, typically once a year or before returning the unit. Failing to do so may result in deductions from your security deposit.
🫁 It’s Good for Your Health
Curtains accumulate dust, allergens, bacteria, and even mold spores — especially in humid conditions. Dirty curtains can trigger allergic reactions, sinus issues, or asthma flare-ups. Regular cleaning helps ensure the air in your home stays clean and healthy.
2. Common Curtain Types in Singapore Homes 🧵
In Singapore, curtain systems are pretty standard but can vary depending on the age and type of your home.
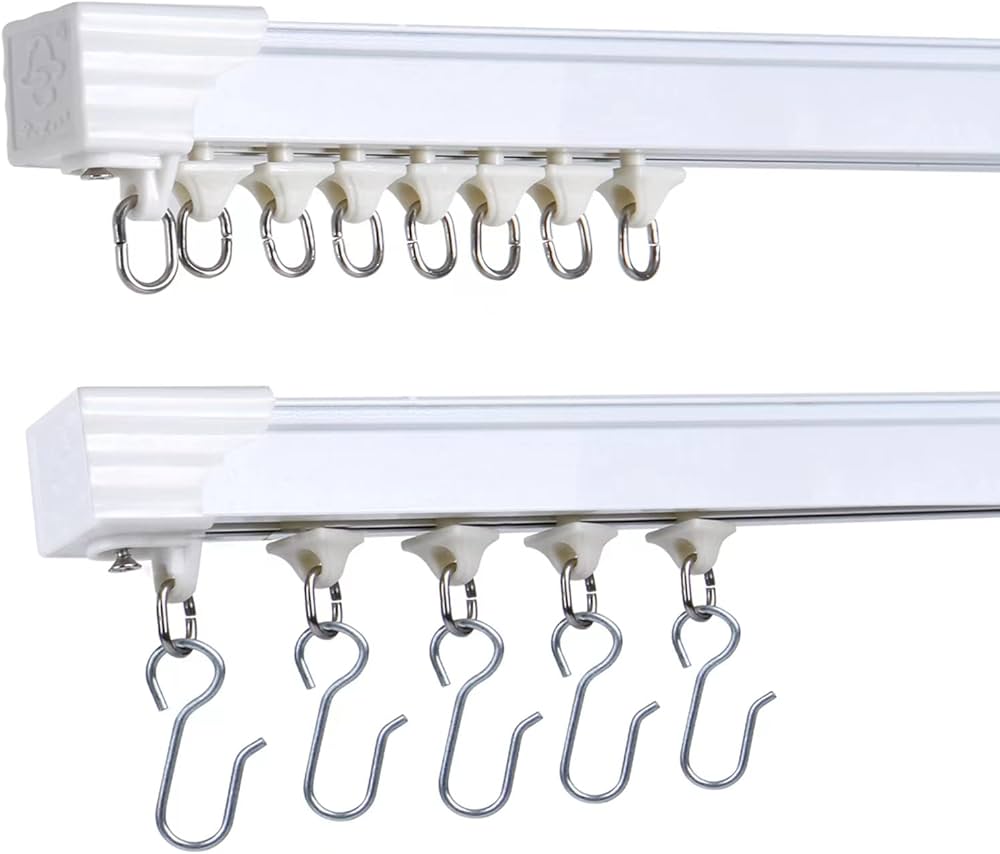
Track with Hooks (Most Common)
Found in most condos and HDBs, this setup uses plastic or metal hooks attached to a ceiling or wall-mounted curtain track.

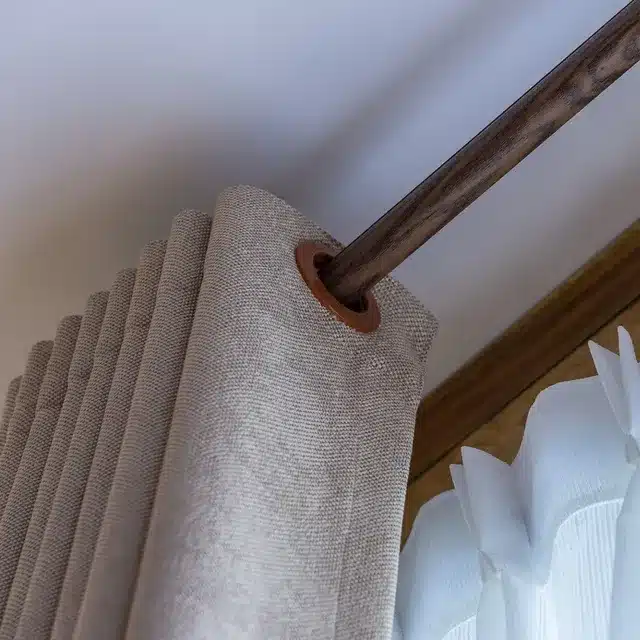
Rod with Eyelets (Older Homes/Ikea )
The curtain rod goes through circular eyelets in the curtain fabric. Still seen in older HDB flats.

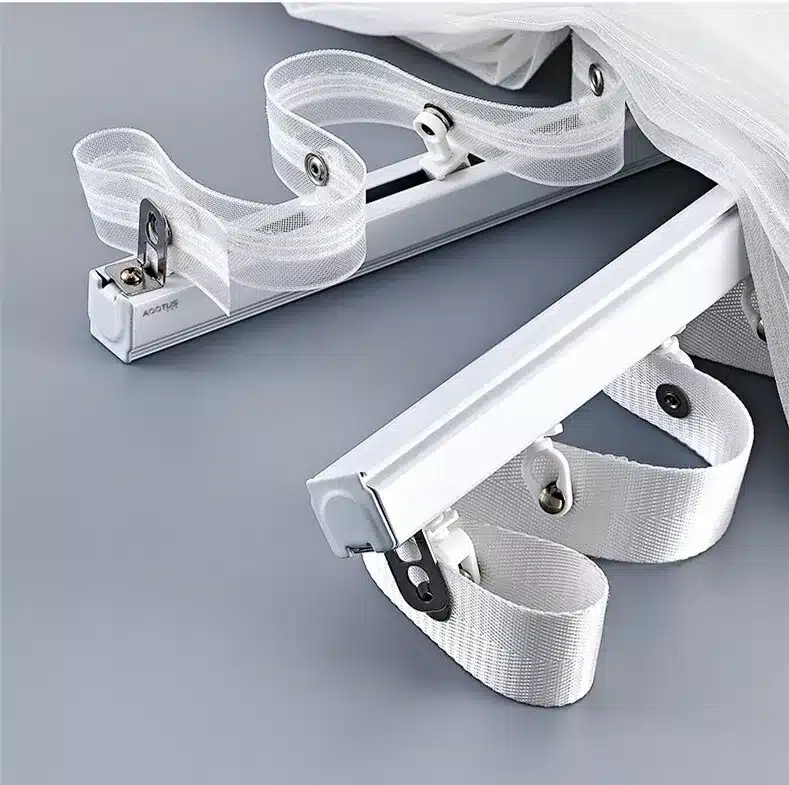
Double S-Wave Curtains (Less Common, Stylish)
These use a clip-on mechanism for the S-wave shape, often found in more premium or recently renovated homes.

3. How to Dismantle Curtains for Cleaning 🛠️
🔧 Tools You’ll Need
- 1.5m Ladder – Ideal for condo units with ceilings over 2.5m
- Sturdy Chair – Suitable for HDB flats with lower ceilings
- Storage bag – To hold your hooks and avoid losing them
- Phone Camera – Take reference photos before dismantling
🔄 Step-by-Step Process
- Preparation
- Push each side of the curtain to the end.
- Always start from the ends, especially where the last hook is fixed. This saves you from constantly moving the chair/ladder.
- Sequence Matters
- If you have two curtain tracks (common in Singapore), remove the night curtains first, followed by the day curtains.
- Dismantle Curtains from Track
- Use one hand to hold the curtain firmly, and the other to unhook the curtain gently from the track.
- This prevents the curtain’s weight from pulling down and possibly damaging the curtain track.
4. Preparing Curtains for Cleaning 🧼
Remove All Hooks
- Metal hooks: Lodged directly into the fabric — pull out carefully.
- Plastic hooks: Slotted into pleats — gently detach and store.
- Some curtains have semi-permanent sewn-in plastic hooks with removable tips — only detach the tip.
Choose the Right Cleaning Method
- Day Curtains (sheer): Can be machine washed or dry cleaned.
- Night Curtains (blackout/semi-blackout): Should always be dry cleaned to avoid damaging the blackout lining.
- Always iron your curtains for best results — folding creases may disappear after 1–2 weeks of hanging, but deep creases require ironing to look neat.
Prefer to skip the hassle of washing it yourself? Send your curtains to Eazihome Laundry for expert care:
- $9/kg for all types of curtains – laundry & dry clean
- 3–5 working days turnaround
- Includes professional cleaning and ironing
- Comes with an official receipt (great for rental agreement documentation)
- Estimate Curtain Cleaning Cost
5. How to Install Curtains After Cleaning🧩
1. Reattach the Hooks
- For metal hooks, insert them back into the original fabric holes.
- For plastic hooks, slide them into the pleats, and make sure the tips are aligned at the same height — this ensures the curtain will hang evenly.
2. Install Curtains Back on the Track
- Start from the non-fixed end of the track first.
- Work your way toward the fixed end, and insert the last hook at the fixed end last. This makes alignment easier and reduces strain on the curtain track.
Pro Tip:
Get someone to help you hold the curtain during installation — especially if the curtain is heavy. This reduces the weight on the track and prevents accidental bending or breakage.
6. Common Mistakes to Avoid ⚠️
Mixing up curtain panels – Curtains for different windows may vary in size. Even left and right side panels can differ. Always take reference photos before dismantling.
Forgetting hook positions – Hooks placed at uneven heights can make your curtains look lopsided.
Not supporting curtain weight during removal/installation – This can damage tracks, especially for heavier blackout curtains.
Skipping ironing – Some creases will not fall out naturally. Ironing is key for that crisp, hotel-like finish.
Removing and installing the curtains can be a small effort if you know how to do it. You’ll get fresh, clean curtains without the high cost of full-service removal and reinstallation. Plus, it gives you more control over timing — perfect if you’re prepping for an inspection, doing spring cleaning, or just want your home to feel lighter and fresher.
So next time your curtains start looking dull or dusty, consider taking them down and sending them in for a wash. A cleaner, healthier home might be just a few hooks away.